Garden Fun With Your Kids

Gardening is a great way to spend quality time with your kids, get fresh air, and teach them where their food comes from. Building a raised veggie bed is one of the best projects to kickstart your family’s green thumb. It’s fun and educational, and the kids will love seeing the fruits (and veggies!) of their labor. Let’s dive into three simple ways to build a raised veggie bed you and your young crew can tackle together.
1. The Classic Wooden Box
This is the most common type of raised bed, and it’s easy to see why: it’s simple, sturdy, and lets you get creative with the design. Here’s how you can build one:
Materials:
- Untreated wood planks (cedar or redwood are best as they’re naturally rot-resistant)
- Screws or nails
- A drill or hammer
- Garden fabric or cardboard for weed prevention
Steps:
- Measure and Cut: Decide how big you want your bed. A standard size is 4×4 feet—big enough to grow a variety but small enough to reach across. Cut your wood accordingly.
- Assemble the Box: Using screws or nails, attach the planks to form a box. Let the kids hold the boards steady while you fasten them—don’t forget the safety glasses!
- Prepare the Base: Lay the garden fabric or cardboard inside the box to prevent weeds from popping up.
- Fill It Up: Let your kids help pour in the soil. Mix in some compost if you’re feeling fancy.
Pro Tip: Let your little ones decorate the outside of the box with paint or markers. It adds a personal touch and gives them a sense of ownership!


2. The No-Build, Easy Peasy Straw Bale Garden
This option is perfect if you’re short on time or tools. It turns gardening into a magical experiment. Plus, what kid doesn’t love bales of straw?
Materials:
- Straw bales (not hay, which contains seeds)
- Garden soil
- Fertilizer (optional, but speeds up the process)
Steps:
- Arrange the Bales: Lay the straw bales in your desired formation—square, rectangle, or even a long row. Make sure the cut side is facing up.
- Condition the Bales: Water the bales thoroughly for a week, and sprinkle on a little fertilizer every few days. This helps the bales start to decompose and create a rich growing environment.
- Add Soil: Once conditioned, top the bales with about 3-4 inches of garden soil.
- Plant Your Veggies: Let the kids dig little holes and drop seeds or seedlings. Water well, and watch your straw bales turn into a bustling garden bed!
-
Pro Tip: Straw bales are also great for growing potatoes—tuck the seed potatoes into the sides of the bales and watch them grow!


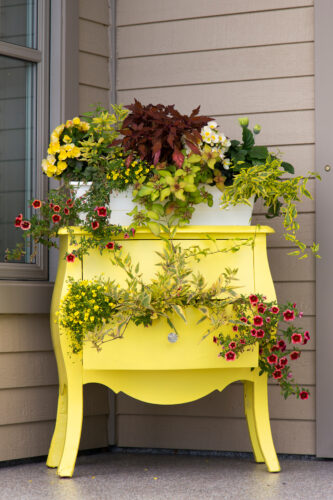


3. The Upcycled Treasure Chest
Turn old items into charming garden beds. This project is about using what you have—old drawers, bathtubs, or even kiddie pools can become unique planters. It’s an excellent way to teach kids about recycling and repurposing.
Materials:
- An old container (drawer, bathtub, trough, or whatever you can find)
- Drill with a bit for drainage holes
- Garden soil
- Paint (optional for decorating)
Steps:
- Find Your Container: Hunt through the garage or visit a thrift store. The more unusual, the better!
- Drill Drainage Holes: This is crucial to prevent water from pooling and rotting your plants’ roots. Let the kids count how many holes you drill—it’s good math practice!
- Fill and Plant: Fill your container with soil, then let the kids help plant seeds or seedlings. Water generously.
- Decorate: Hand over the paints and let the kids unleash their creativity. Your upcycled planter will be a unique garden centerpiece!
Pro Tip: Look for containers with character. Bright colors, quirky shapes, or vintage styles add charm and make your garden unique.
Building a raised veggie bed is more than just a weekend project—it’s a chance to bond with your kids, instill a love of nature, and create something you can nurture together. Whether you’re hammering nails, conditioning straw, or drilling holes in an old bathtub, each bed will become a living classroom where your little ones can learn, explore, and taste the rewards of their hard work.
So, grab your tools, straw bales, or that funky old drawer, and get ready to dig in. Your backyard adventure awaits!
Thirsty for more ideas? Bring the children to First Saturday Markets each month at Hope Farms, which feature ree cooking and gardening classes for you and the children! MORE DETAILS.
About Dany Millikin. Our VP of Operations is not only a certified Master Gardener but is also recognized as one of the best Gardening Educators in the country. Dany loves all peppers and is particularly fond of Chilitepins, which bring back many childhood memories from summers spent on his grandparent’s ranch in South Texas.